How Custom End of Arm Tooling Enhances Robot Performance
Robots get most of the attention in automation projects. People talk about payload, reach, repeatability, controller speed, and cycle time. Those specifications matter, but they do not tell the whole story. In practice, a robot only performs as well as the device attached to its wrist. That device, the end of arm tooling, is where a well-planned automation cell either earns its keep or quietly creates years of headaches.
I have seen expensive six-axis robots reduced to little more than awkward motion platforms because the gripper was too heavy, too fragile, too inconsistent, or simply wrong for the part. I have also seen modest robot systems outperform expectations because the tooling was designed around the realities of production: part variation, chip contamination, heat, scale, awkward geometries, and operators who need the system to recover quickly when something goes off script.
Custom end of arm tooling is often treated like a line item near the end of a project. It should be treated like a performance multiplier. When it is engineered to match the process, the part, and the work envelope, it improves reliability, reduces downtime, shortens cycle time, and makes the entire cell easier to run. That applies whether the application is machine tending, robotic welding, CNC automation, palletizing, inspection, or assembly.
The wrist is where theory meets the factory floor
A robot arm moves with precision, but it does not create value by moving through space. Value comes from interacting with a real object in a real environment. That sounds obvious, yet many automation plans still underestimate what happens at the point of contact.
Take machine tending in a CNC automation cell. The robot may need to pick a raw part with oily surfaces, orient it correctly, load it into a chuck or fixture with tight positional requirements, wait for a machining cycle, then remove a finished part that may be warm, wet with coolant, and covered in chips. The same gripper may also need to handle dunnage, interact with a part-present sensor, and survive a few thousand cycles per shift. Off-the-shelf tooling can sometimes do the job, but often only if the process is forgiving. Most shops are not that forgiving.
In robotic welding, the tooling challenge shifts. The robot is still carrying an end effector, but now cable routing, torch angle, collision recovery, anti-spatter protection, and access to complex joint geometries become central. A standard mount may fit the torch, but it will not necessarily optimize reach, service life, or bead consistency. Tooling decisions affect more than mechanical attachment. They affect process stability.
This is where custom design starts paying back. Good end of arm tooling is not only shaped for the part. It is shaped for the process variation around the part.
What custom tooling actually changes
The first and most immediate gain is part control. A robot can only place a part accurately if it can hold it consistently. Custom grippers account for features that generic tooling often ignores, such as flash lines, draft angles, bore concentricity, casting mismatch, or a machined edge that should never be used as a locating surface. The contact points can be chosen to avoid marring cosmetic surfaces, avoid thin sections that flex under clamping force, and maintain orientation through acceleration and deceleration.
That improved control turns into measurable performance. If the tooling grips repeatably, the robot can move faster with less risk of dropping or shifting the part. Engineers often focus on robot speed settings in the controller, but actual safe speed depends heavily on the end effector. A gripper with insecure contact or poor center-of-gravity alignment forces conservative motion. A well-designed custom tool allows the robot to use more of its performance envelope.
Weight matters as much as grip. End of arm tooling sits at the far end of the kinematic chain, where every extra pound affects inertia, stopping distance, and motor load. I have seen cells where adding a vision camera, a pneumatic gripper, and a steel bracket pushed the wrist into a range that created sluggish motion and inconsistent positioning during high-speed moves. Reworking the assembly in aluminum, trimming unnecessary bracketry, and relocating the camera mount transformed the system without changing the robot itself. The robot did not get stronger. The tooling got smarter.
Durability is another major factor. In many environments, the wrist tooling lives a harder life than the robot arm. Coolant overspray, weld spatter, abrasive dust, hot scale, sharp edges, and accidental impacts all take their toll. Generic solutions may function in a clean demo cell and fail within weeks on a production line. Custom tooling can incorporate hardened wear points, replaceable pads, protected airlines, compliant features, and impact-resistant geometry. Those choices do not look glamorous on a rendering, but they matter deeply after six months of three-shift production.
Performance is not just cycle time
When people say a robot needs to perform better, they often mean faster. Speed matters, but in production, performance is broader than cycle time alone. It includes uptime, scrap rate, changeover time, operator intervention, maintenance burden, and recovery after faults.
Custom end of arm tooling improves uptime because it reduces the number of nuisance stops. A generic gripper may occasionally miss a part because dimensions drift within a normal tolerance band. A better-designed tool accommodates that variation instead of treating every slightly imperfect part like a fault condition. Over the course of a month, that kind of resilience matters more than shaving half a second from an ideal cycle.
It also improves quality. In CNC automation, loading a part even a fraction of a millimeter off the intended datum can affect clamping consistency, machining accuracy, or subsequent gauging. In robotic welding, the tool that presents or supports the workpiece can influence fit-up, and fit-up directly affects weld quality. In inspection cells, tool repeatability determines whether the sensor is measuring the part or measuring handling inconsistency.
There is also the issue of recovery. A production manager rarely judges a cell on how it behaves when everything is perfect. They judge it on how quickly it gets back to work when something is not perfect. Custom tooling can be designed for graceful failure modes. Fingers can include lead-ins that help reseat a part after a small misalignment. Compliance can absorb a minor collision without bending a bracket. Quick-change interfaces can let maintenance swap a damaged assembly in minutes instead of tearing down half the wrist.
Machine tending exposes every weakness in a gripper
If you want to understand why custom tooling matters, spend time around a machine tending cell that runs real production, not staged demos. Few applications reveal tooling weaknesses faster.
Parts vary. Sometimes that variation comes from incoming material. Sometimes it comes from upstream operations. Castings can arrive with scale or flash. Forgings can shift slightly from one lot to the next. Saw-cut blanks may not present a perfect pick face. Add coolant mist, chip buildup, and fixture wear, and the robot is no longer dealing with textbook conditions.
A custom gripper for machine tending needs to be built around those realities. The jaw geometry has to locate from reliable features. The stroke has to cover expected part variation without losing holding force. The finger material has to balance grip and wear. The body has to avoid interfering with the chuck, door, fixture, probes, and guarding. In dual gripper designs, which are common in CNC automation to reduce cycle time, the center-of-gravity issue becomes even more important because one side may carry a raw part and the other a finished part with different mass distribution.
I worked on a cell years ago that loaded turned steel components into two lathes. The original concept used a standard parallel gripper with flat fingers. It worked fine during testing with clean sample parts. On the floor, chips and residual coolant changed everything. Parts occasionally seated slightly differently between the flats, which caused enough orientation drift to create intermittent load faults at the chuck. The robot was blamed at first. The real problem was that the fingers were locating on a broad, inconsistent surface. We redesigned the fingers to capture a more reliable diameter with chamfered entry and a debris relief pocket. Faults dropped dramatically. Nothing changed in the robot program except confidence in the picks.
That is the difference custom tooling makes. It accounts for the part you actually run, not the idealized model in the CAD file.
Robotic welding demands more than a torch mount
In robotic welding, end of arm tooling often gets reduced to torch selection and neck geometry. Those are critical, but the support hardware around the torch can have just as much impact on performance.
Cable management is a common example. Poor routing creates drag, inconsistent torch orientation, or premature wear in hoses and conductors. Custom wrist tooling can guide those services through a controlled path that protects them from heat and snagging while preserving robot motion. That may seem like a detail until a cable https://simonqvbg759.wordcanopy.com/posts/manufacturing-automation-for-small-and-mid-sized-canadian-businesses package starts affecting path accuracy at the extremes of the robot envelope.
Another issue is collision behavior. Welding cells deal with fit-up variation, distortion, and fixture drift. Sooner or later, a torch will meet something it was not supposed to meet. A thoughtfully designed mount can include a collision device, compliance, or a recovery-friendly arrangement that reduces damage and helps the system resume production quickly. The cheapest rigid bracket is not always the lowest-cost choice once downtime enters the picture.
Custom tooling also supports access. Weld quality often depends on approaching a joint at the right angle while keeping the nozzle clear of obstacles. Off-the-shelf arrangements may force compromises in reach or increase the need for awkward robot postures. A custom offset, compact mount, or tailored neck support can open up paths that improve both bead quality and cycle efficiency.
When paired with solid programming and fixture design, better tooling gives the robot more predictable conditions. That consistency makes it easier to tune weld parameters and maintain stable production from shift to shift.
The best tooling starts before fabrication
Strong end of arm tooling does not begin in the machine shop. It begins with asking better questions. What part features are truly stable enough to grip? Where does contamination build up? How often will the product change? Will the operator ever need to load manually? Does the robot need to survive a crash without losing calibration? How will maintenance replace wear components on a Sunday night with limited support?
These questions sound basic, but they are often skipped in early project phases because teams are focused on reach studies and cycle estimates. By the time the tooling is addressed, the robot model is selected, the cell footprint is fixed, and the schedule is tight. That is exactly when compromises creep in.
The strongest automation teams bring tooling into the conversation early, especially in CNC automation and machine tending projects where the handling details are inseparable from the machine interface. A robot may physically reach into a machining center, but that does not mean the gripper can clear the door frame, avoid probes, enter the fixture, and still maintain enough grip security for fast extraction. Those are tooling questions.
The same goes for controls integration. Good mechanical design should inform the software strategy. If the gripper includes sensors for open, closed, part present, or finger position, those signals shape fault logic and recovery routines. If there is compliance or a floating mechanism, the robot path may need to account for that motion. If the system uses servo grippers or multiple actuators, HMI programming becomes more important because operators and technicians need clear status, diagnostics, and manual control options.
Sensors, compliance, and intelligence at the wrist
Custom end of arm tooling today is often more than a piece of metal with jaws attached. It can be an integrated subsystem.
Part-present sensors are a simple example, but even they need careful placement. If a sensor is mounted where coolant, chips, or weld spatter accumulate, false signals will become a recurring problem. In custom designs, sensor protection and cleaning access are just as important as the sensor type itself.
Compliance mechanisms are another valuable tool. A little controlled float can help when loading parts into fixtures, machines, or nests that require contact-based alignment. Too much compliance, though, can create inconsistency or make motion less predictable at higher speeds. The right amount depends on the application. For precision load-unload work, compliance should solve a known insertion challenge, not mask poor robot calibration or loose fixturing.
Some modern grippers add force feedback or servo control, which can be useful for fragile components, mixed-model production, or operations where grip force needs to adapt. Those features are not automatically an upgrade. They add complexity, cost, and additional failure points. The value is highest when the product mix or handling requirement truly demands them.

This is where experience matters. There is a tendency to over-engineer tooling with every available feature. The best custom tooling is not the most elaborate. It is the one that solves the real production problem with the least complexity necessary.
HMI programming matters more than most people expect
End of arm tooling performance does not stop at hardware. If the tooling has multiple actuators, sensors, or changeover modes, the operator interface has to support them intelligently. Poor HMI programming can turn a capable tool into a service nightmare.
A well-designed HMI should make the state of the tool obvious. Operators should be able to see whether the gripper is open or closed, whether part-present signals are healthy, whether air pressure is sufficient, and whether the tool is in a fault state that requires manual intervention. Maintenance should be able to jog actuators, review diagnostics, and verify sensor function without digging into obscure controller screens.
I have seen troubleshooting time cut in half simply because the HMI was revised to show a clear sequence status tied to the end effector. Instead of guessing whether a part failed to load because the robot missed position, the chuck was not ready, or the gripper never confirmed closure, technicians could immediately identify the broken link in the chain.
That matters in high-utilization CNC automation cells where every minute of downtime counts. Custom tooling often introduces specialized functions, and specialized functions demand equally thoughtful interface design. Mechanical and controls teams need to work together, not in sequence.
Tool changeovers and future flexibility
A custom tool should fit the current part family, but it should not box the plant into a corner if production changes six months later. That is a common tension in tooling design. The tighter and more specialized the gripper, the better it may perform on one job. The broader and more flexible it becomes, the more compromises may show up in mass, complexity, or precision.
There is no universal answer here. The right approach depends on product stability, expected launch cadence, and labor constraints. In some plants, a dedicated tool for each part family is the right decision, especially if quick-change hardware keeps swaps manageable. In others, adjustable fingers or modular nests are worth the added complexity because the line handles frequent variation.
The key is making that decision deliberately. A custom tool can absolutely be designed for flexibility, but flexibility should be engineered, not assumed. That means thinking through datum changes, sensor adjustment, cable slack, program selection, and operator error-proofing from the start.
Where projects usually go wrong
Most tooling problems can be traced back to one of three issues: unrealistic assumptions about the part, insufficient attention to contamination and wear, or poor communication between mechanical, controls, and production teams.
The CAD model may show a clean, dimensionally stable part. The real part arrives with burrs, oxidation, oil, and tolerance stack-up. The mechanical designer may create a precise gripping concept that becomes unreliable after a few days of chip accumulation. The controls team may build logic around ideal sensor timing that does not hold up once pneumatics age or supply pressure fluctuates. Production may discover during launch that a finger replacement requires removing the entire wrist assembly.
None of these failures usually come from lack of intelligence. They come from design happening too far from production reality. The best custom end of arm tooling projects include direct input from the people who run, maintain, and troubleshoot the cell.
One practice I trust is building in serviceability from the start. Wear pads should be replaceable without heroic disassembly. Sensors should be visible and reachable. Fasteners should be accessible with ordinary tools. If a jam occurs, the operator should be able to understand what happened without opening a dozen screens or removing a guarding panel. These are not afterthoughts. They are part of robot performance.
Why the investment pays back
Custom tooling usually costs more upfront than a catalog gripper with simple fingers. That is true, and it should be acknowledged plainly. The mistake is evaluating that cost in isolation.
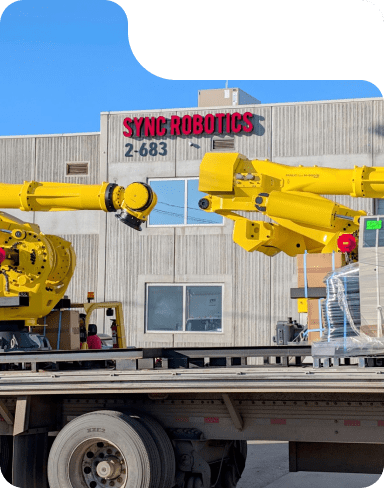
If a custom end of arm tool improves cycle time by a few seconds, reduces scrap, avoids frequent part drops, and cuts operator intervention, the return can show up quickly. In a machine tending cell that runs around the clock, even small gains multiply fast. If it prevents one serious crash in a robotic welding system, the avoided downtime alone may justify the design effort. If better HMI programming tied to the tooling reduces fault recovery time across multiple shifts, that benefit keeps paying every week.

The deeper value is confidence. A stable cell gets trusted. Once production and maintenance trust a robot system, utilization goes up, expansion becomes easier to justify, and automation starts being viewed as an asset rather than a project that constantly needs nursing.
That trust is rarely created by the robot arm alone. It is earned at the end of the arm, where the machine meets the work.
The shops that get this right
The most successful automation users tend to share the same mindset. They do not ask only, “Which robot should we buy?” They ask, “How should this system hold, present, protect, sense, and recover?” That is a better question, and it leads to better results.
Custom end of arm tooling is where application knowledge becomes mechanical reality. It turns general-purpose robot motion into process-specific productivity. In CNC automation, it stabilizes load and unload sequences under messy shop conditions. In machine tending, it absorbs variation that would otherwise stop the cell. In robotic welding, it protects process quality while improving access and service life. When paired with clear HMI programming and practical maintenance design, it gives the robot a far better chance of running like production equipment instead of a lab demo.
A robot without the right tooling is potential. A robot with the right custom tooling is performance.
Sync Robotics Inc. — Business Info (NAP)
Name: Sync Robotics Inc.Address: 2-683 Dease Rd, Kelowna, BC V1X 4A4
Phone: +1-250-753-7161
Website: https://www.syncrobotics.ca/
Email: [email protected]
Sales Email: [email protected]
Hours:
Monday: 8:00 AM – 4:30 PM
Tuesday: 8:00 AM – 4:30 PM
Wednesday: 8:00 AM – 4:30 PM
Thursday: 8:00 AM – 4:30 PM
Friday: 8:00 AM – 4:30 PM
Saturday: Closed
Sunday: Closed
Service Area: Kelowna, British Columbia and across Canada
Open-location code (Plus Code): VHWR+PQ Kelowna, British Columbia
Map/listing URL: https://maps.app.goo.gl/xwtV2wEu8ZuKH3se8
Embed iframe:
Socials (canonical https URLs):
LinkedIn: https://www.linkedin.com/company/syncrobotics/
Instagram: https://www.instagram.com/syncrobotics/
Facebook: https://www.facebook.com/syncrobotics/
https://www.syncrobotics.ca/
Sync Robotics Inc. is an industrial robot and controls integration company based in Kelowna, British Columbia.
The company designs and deploys automation solutions for manufacturing operations across Canada.
Services include industrial robotics integration, controls integration, automation system design, deployment support, and related manufacturing automation solutions.
Sync Robotics Inc. is located at 2-683 Dease Rd, Kelowna, BC V1X 4A4.
To contact Sync Robotics Inc., call +1-250-753-7161 or email [email protected].
For sales inquiries, email [email protected].
Hours listed are Monday to Friday 8:00 AM–4:30 PM, with Saturday and Sunday closed.
For directions and listing details, use the map listing: https://maps.app.goo.gl/xwtV2wEu8ZuKH3se8
Popular Questions About Sync Robotics Inc.
What does Sync Robotics Inc. do?Sync Robotics Inc. designs and deploys industrial robot and controls integration solutions for manufacturing operations.
Where is Sync Robotics Inc. located?
Sync Robotics Inc. is located at 2-683 Dease Rd, Kelowna, BC V1X 4A4.
Does Sync Robotics Inc. serve clients outside Kelowna?
Yes—Sync Robotics Inc. is based in Kelowna, British Columbia and serves clients across Canada.
What are Sync Robotics Inc.’s hours?
Monday–Friday: 8:00 AM–4:30 PM; Saturday and Sunday closed.
How can I contact Sync Robotics Inc.?
Phone: +1-250-753-7161
General Email: [email protected]
Sales Email: [email protected]
Website: https://www.syncrobotics.ca/
Map: https://maps.app.goo.gl/xwtV2wEu8ZuKH3se8
LinkedIn: https://www.linkedin.com/company/syncrobotics/
Instagram: https://www.instagram.com/syncrobotics/
Facebook: https://www.facebook.com/syncrobotics/
Landmarks Near Kelowna, BC
1) Kelowna International Airport2) UBC Okanagan
3) Rutland
4) Orchard Park Shopping Centre
5) Mission Creek Regional Park
6) Downtown Kelowna
7) Waterfront Park